The InterWeb is cool, but print zines are cooler. Although it’s about hundred times easier to make a print zine in the digital age (especially with photos,) it’s still quite a bit of work. When you factor in the cost the project gets to be less appealing, especially if you want to distribute a lot of copies. Every once and a while I get the urge to make another print issue of Skate and Annoy. My biggest problem with print issues is that I’m always waiting for some event that I want to put in it, and I keep adding pages as I go along. – “Man, I gotta include this too!” Pretty soon they become these massive projects that approach the size of a phone book. And then it becomes a major expense to print them unless you know someone at a copy shop (I don’t) or you can go out and sell adverts (I don’t want to.) In the end they either don’t get made or else only a few copies are printed. I salute those of you who actually pull it off, but for the lazy, busy, and budget constrained, the micro zine is a viable alternative.
I’m not the first person do this by any means. It sounds like a cliche but I actually learned about this method in art school. Money well spent, right? A microzine is a zine that could be printed fast and cheap. It’s a double sided print on a single sheet paper. This method gives you a small 16 page zine that can still hold a lot of information. There are other methods for using a single side of the page folded and cut that give you a larger page size but fewer overall pages and a more complicated folding scheme. The method illustrated here can be run off on a laser printer quickly and cheaply. Inkjets will work for a small handful, but with a lot of pictures the page starts to get saturated with ink and turns wet and soggy. Inkjets are also gluttons with the ink on these types of prints. Blowing out your cartridge will negate the benefit of making this affordable. The guy that runs the place where we rent our mailbox said he’d make me 200 black and white copies for 5 cents a piece. That’s Ten bucks. This might be cheaper than the “off the street” price, but if you are a regular somewhere you might be able to get a similar deal.

Design:
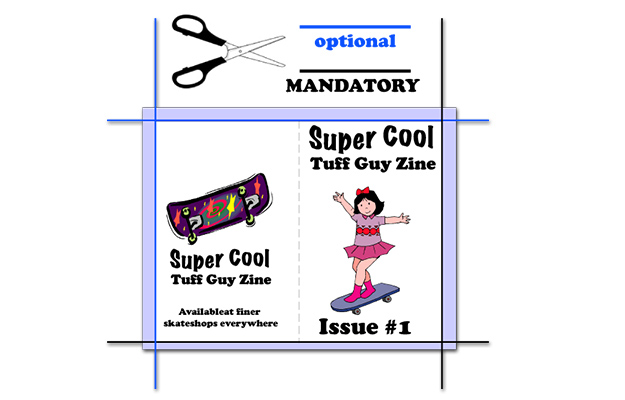
The first thing you need to do is pick your printer. You need to figure out what your safe area is. The safe area is the parts of the page that will be left once you trim all the edges. When you fold the paper into quarters (before stapling) you will need to make at least two cuts to get all the pages to open. If you don’t want your pages to have any white border around them, you’ll need to make four cuts per zine.
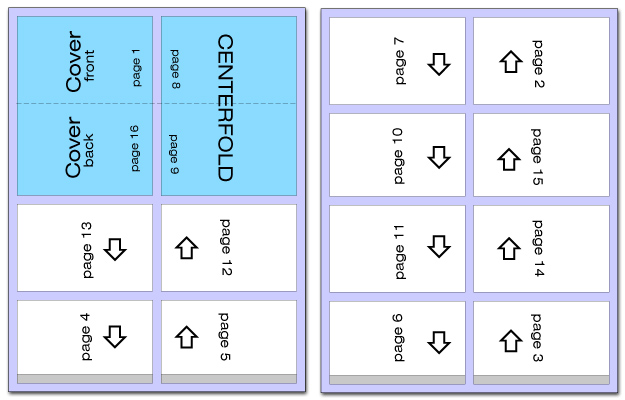
Some printers will print a full bleed (edge to edge) but most leave a quarter inch border along three sides and a half inch border on the bottom. I chose to make my cuts at the edge of the 1/4 inch printable border, so I could give the appearance of a full bleed. Because of the half inch border on the bottom, four of the pages will have a smaller print area than the rest. I chose to leave that as is instead of trimming to the half inch mark on those sides because it really cuts down on the page size if you do. OK, that’s not the real reason. I did make a bunch at the half inch mark too, but was never able to get the “safe” area figured out exactly in a template. I was wasting too much time so I blew it off. The Purple represents the 1/4 inch boarder around the entire page, and the gray represents the half inch border on the bottom of each page. Download the layout guide in PDF format.
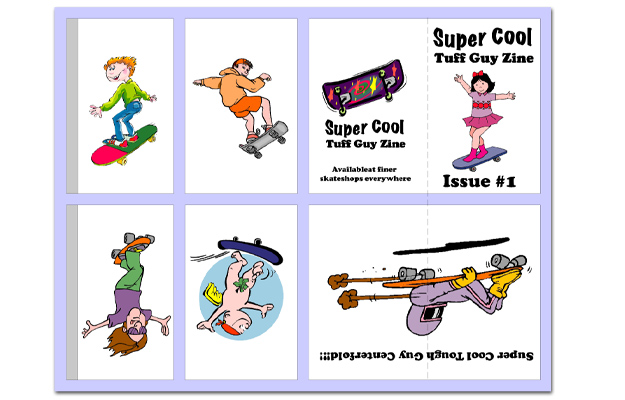
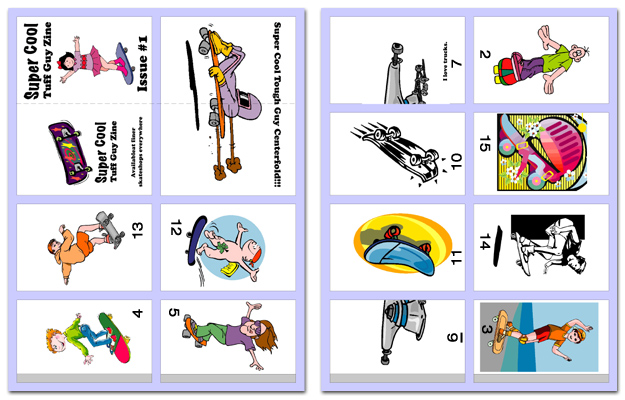
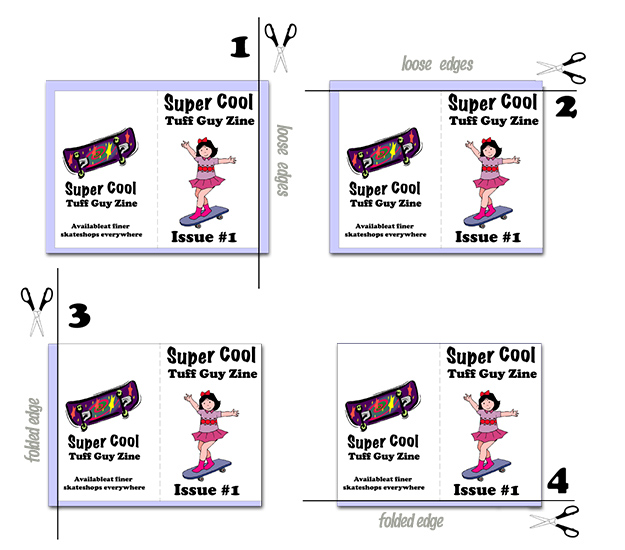
Below is what it will look like printed, except they will both be on the same page. Notice the cover and the centerfold are the only two spreads that can have one image that covers two connected pages once everything is cut and stapled. You can still make an image cover two pages if you split it up in half like the illustration of the truck on pages 6 and 7. Also, you can see on pages 10 and 11 that the images are oriented horizontally. If you look at the layout guide above you’ll notice that the arrows point the top orientation for horizontal layout, like centerfolds that aren’t actually in the center. Again, make sure you follow the layout guide when attempting this because no two pages are correctly adjacent except for the cover and centerfold. It looks confusing and wrong, but if you remember to fold it right the layout guide is correct.
If you are ambitious, and need copies in the thousands range, you can get single sheet pages printed out with full color (or full color on one side, black and white on the other for cheaper) , full bleed images from many online print shops. You’ll need to adjust your template accordingly, and the paper is usually glossy and heavier than standard copy paper.
Printing:
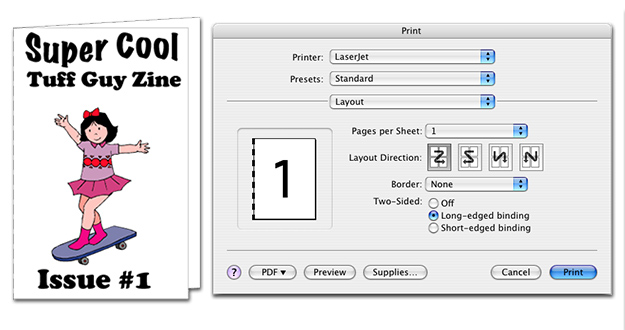
Layout your pages in whatever program you want. Heck, you can even do it with scissors and glue the old fashioned way. If your printer can duplex, and copy shop printers will be able to, make sure the document print settings are set so the half inch border is on the bottom of each page. Here’s how it looks on my machine, printing from Acrobat Reader. If you don’t have a duplexer you can run all of one side through at once, and then flip the paper over to print the other side. Make sure you do a test on the first of the second side, fold it up and cut it to make sure you aren’t putting the second page upside down. The same goes for using a regular old copier.
(Note: Apologies to Lance Mountain? I don’t think I made up the name Super Cool Tough Guys. I’m pretty sure it’s the name of Lance’s first band or zine or something else. If not, I’m claiming it.)
Folding:
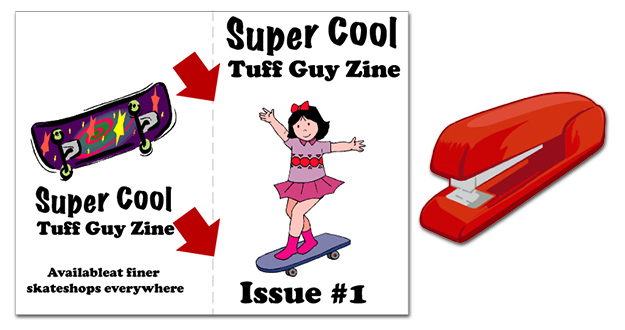
Once you’ve got a stack of printed zines, it’s time to start folding. Again, fold one and cut it first to make sure you are doing it right. Believe it or not, if you don’t fold it right, some of the pages will be out of order. One tip is to make sure the cover is always facing you, and fold everything behind the cover. You will only be making two folds before you cut. Go ahead and fold all the papers first. it will be faster than folding, cutting and stapling individual zines.
(Note: I wish I had saved a print sized layout of this zine. It would be a funny one to give people, just to see how they respond.)

Cutting:
You only need to make two cuts per zine to make it functional. If you have full belled photos you might want to make 2 additional cuts that will make your overall page size slightly smaller. You can make them with scissors, but it will be quicker, easier, and less carpel tunnel syndrome inducing if you use a paper cutter. You can walk into most copy shops and use theirs for free. Otherwise they are kind of expensive. Don’t try to cut more than one zine at a time. You will find yourself making more mistakes, the paper will shift, and it will look less uniform. Because of the nature of folding paper, you’ll already have to deal with enough inaccuracies. Again, there is a preferred order to cutting the pages. If you do it in order, you won’t have to worry about having loose pages until you make the last cut.
On this example, I included crop marks on the cover of the zine so I would know where to trim them to get full bleed photos. I had the image extend a little past the crop marks because these things just aren’t super accurate. If you’re having these commercially printed you don’t need to worry about this.

Stapling:
Once you’ve got a stack of four tiny pages, fold them in half so you can tell where the staples go. If you have a fancy stapler that has settable stops you can try stapling before you cut, but that just means you’ll have to be extra careful about your trims or else the staple won’t end up exactly on the spine. It’s better to make all the cuts on an individual zine and then fold it in half and staple. I also tried doing the stapling all at once but found it hard to keep all the tiny pages stacked and in order. In the end I wasted more time sorting and straightening.
The fun part:
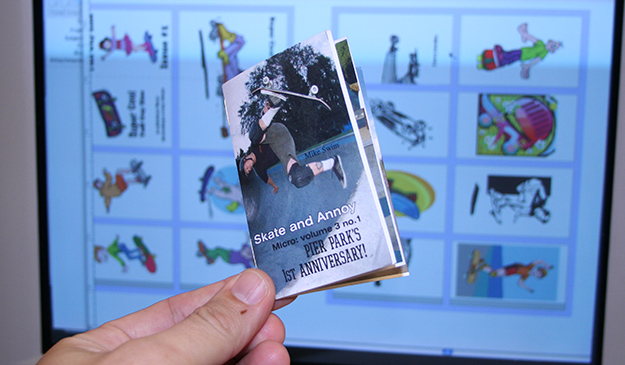
Now go give them away! These make zines, or even product catalogs if you have some other DIY thing going. Wrap small bundles in rubber bands. Depending on your trim area, you can stuff a ton of them nicely into those miniature novelty metal lunch boxes. Congratulations. You are a hipster. If this article gets you stoked to make you own micro zine, then you owe me a copy! Here’s what my first one looked like.
0 comments.