
Original article by Carter Dennis
This article originally existed somewhere on the web. On Feb 02, 2005 it was posted on the Skaters For Public Skateparks (SPS) web site in the DIY forum under the title “Pour Man’s Pool Coping”. We had originally planned on reposting it, but it disappeared before we could get our DIY section up. Then it reappeared on the SPS web site, and author Carter Dennis was kind enough to let us publish it. Carter also happens to be a Southwest Regional Director of Skaters for Public Skateparks. Why re-post the same article? Well, for one thing, you need to register to view the SPS forms. Also, we have a hard time letting go. We figure, the more links this article gets, the more pool coping you are likely to end up skating. Don’t forget to check out the Skaters For Public Skateparks web site, and feel free to contact us with your own advice.
Pool coping blocks are hard to find. Most of our modern pools now use bull nose brick instead of the 2 ft pool coping blocks we all love. There are a few places throughout the country that still manufacture big pool coping blocks, but ordering and shipping these blocks can become expensive. Nothing beats the feeling of clacking over pool coping blocks on a grind, but when you can’t afford the blocks the poor man’s pool coping is the answer to all your grinding needs.
Materials for making mold: 2×4″s, 2″ PVC pipe, duct tape, 3″ screws, 2″ screws, 3/8″ rebar and rebar tie wire, 1/4″ pilot hole drill bit, 3/8″ counter sinking drill bit, lubricant.
Materials for concrete mixture: 5000 to 5500 PSI Concrete, Concrete Sand, Concrete Fortifier, Concrete Bonding Agent and Cure and Seal.
The first step in pouring your own coping is making a mold. You will first need a high powered drill and a 2″ hole saw drill bit. Take a 2×4 and mark a line down the middle of the 2×4. Then you can center the drill bit and begin boring holes every twelve inches. Once you have completed boring holes you rip the 2×4 in half using a circular saw. This will give you the form wood you need to hold your PVC mold in place.
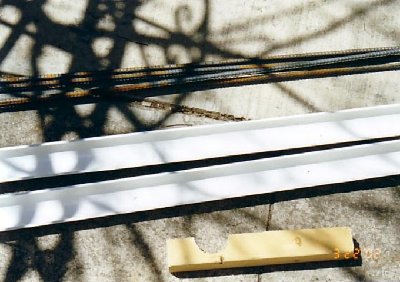
After you have made your form wood, then you need to prepare the PVC pipe. The PVC can be cut in half with a circular saw or jig saw. This can be a difficult process at times. Make sure you have secured the PVC before making the cut.
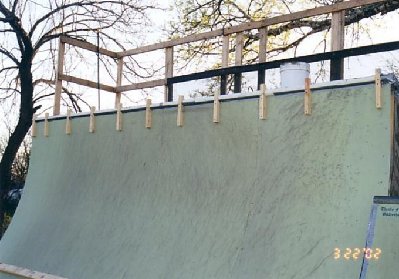
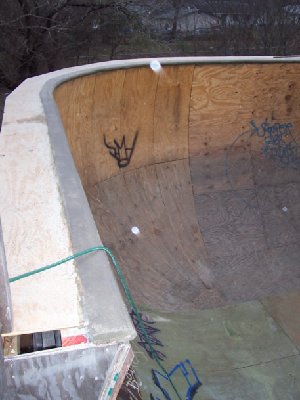
Once you have the materials for your mold then prep the ramp for the pour. Cut small pieces of rebar and secure them with 2″ screws. Then lay long pieces of rebar and tie it to the small rebar pieces. Once you have tied the rebar down tight, then you are ready to start putting the mold together.
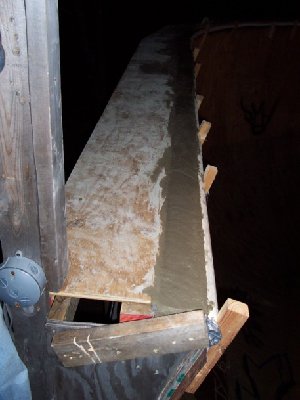
Start screwing your wood forms into the ramp using 3? screws for more holding power. I would suggest putting a wood form every foot and a half. After you have installed the wood forms it is time to lay your half piece PVC into place. Drill a pilot hole through the PVC, and then counter sink the pilot hole with a larger drill bit. Then drill a 2″ screw into the wood form. Countersinking the PVC will help flush the screw to limit any blemishes in the finished product.
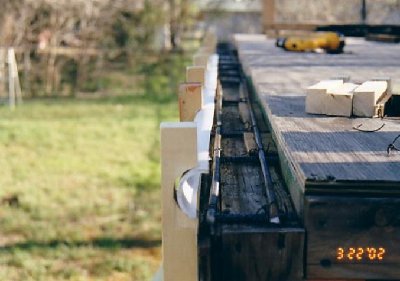
Make sure your form work is secured. You do not want any loose forms or loose PVC. After that you can seal your mold with duct tape especially where the PVC meets the existing tranny.
Once your form is in place and secured, you can start mixing your concrete. Use a high PSI concrete which will cure harder than your normal concrete. At home centers you can find QuiKcrete or Concrete Maximizer both of which will work, but the 5500 psi Maximizer is preferred. For every 80lb bag of concrete use 1/3 a bag of concrete sand. First begin mixing the concrete, and then add the sand. Once you have a rich mixture then add 1/2 a cup of concrete fortifier and 1/2 a cup of concrete bonding agent. Mix the concrete for a few more minutes and you are ready to pour.
It is important to lubricate the inside of the PVC mold before pouring the concrete. Cooking oil spray works great for this and is easy to apply.
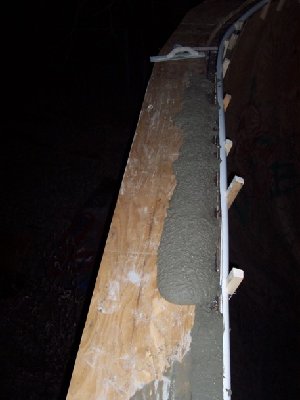
After the coping mold has been lubed, start pouring the concrete. As you are pouring the concrete make sure that you are filling the mold. It is important to pack the concrete all the way into the mold to limit any voids. Once you have packed the concrete, and then begin scrubbing the concrete with a wood or metal float. While you are scrubbing the concrete tap the mold with a hammer to make sure the concrete is settling into the mold. If you have access to a concrete vibrator this will work even better. Vibrate the PVC mold to eliminate any potential void.
The last step in the concrete process is to go over the concrete with a pool trowel. Spend some time with it and smooth out all the rough spots. Then apply some cure and seal to advance the curing process.
Give the concrete at least 24 hours to cure before pulling off the mold. It doesn’t hurt to leave the mold on for a few days, but most likely you will be anxious to see how the coping has turned out. Take the mold off slowly and examine the coping. It’s common for there to be a few small blemishes. Use an angle grinder with an abrasive masonry disc to take care of any imperfections.
Give the coping a few days to cure before you start skating it. The curing process for concrete takes 28 days, so the concrete may be kind of soft the first month. The best way to break the coping in is to paint it. You can use Salba sauce which is clear enamel paint or you can use almost any spray paint or concrete paint. Within the first few months keep the coping sauced regularly. Eventually the coping will build up a protective layer and after awhile you only need to sauce the coping once or twice a month.
Keep in mind that you can use your PVC mold to shape and form different kinds of pool coping. For instance, if you like more of a lip on top on the coping you can cut the PVC a little bit more than a half piece. If you are going to pour coping around a bowled corner it helps to use a heat gun to bend the PVC.

It is a simple process and most people can figure it out just by looking at the pictures. I first used this method three years ago and the coping we poured is still holding up strong after thousands of grinds. Be sure after you remove the mold you give the concrete some time to cure before you start doing five foot ollies to 5-0 truck smacker on the coping. Give the coping a week or two before you start grinding and sessioning it.
0 comments.